Peachtree Case
Home Syllabus Class Schedule Teaching Plans PowerPoint Slides SUA Readings Solutions Peachtree Case Forms class reps

You have already experienced how a manual accounting information system is organized and used by completing the Systems Understanding Aid. The purpose of this assignment using Peachtree Accounting for Windows (version 6.0) is to show how an automated accounting information system is set up and used to process accounting information.  

Peachtree Accounting for Windows is a general ledger accounting package.  I will not spend time in class teaching you how to run Peachtree.  I'll give you some tips below, and the rest is up to you to learn.  It really is fairly simple.  If you have a question, use the on-line HELP function.  If you have tried your best and still have a question, come by and we'll see what we can learn together.

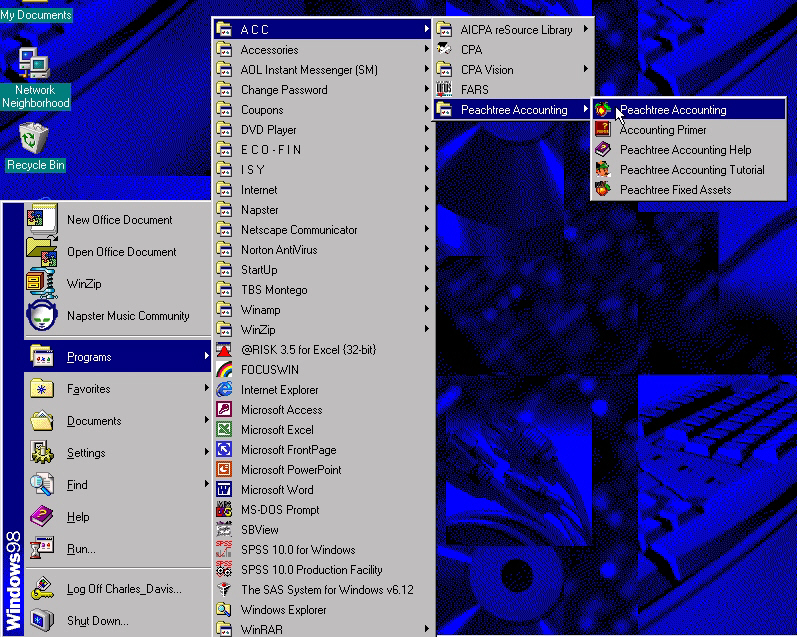
Starting Peachtree

The first thing you will need to do is copy a dummy set of files to your P: drive.  Open my J: drive and look under ACC4502.  You should find a folder named "WOONICKE".  Copy this folder to your P: drive by clicking on it to highlight it and then dragging it to your P: drive.  You will not be able to save any of your work unless you complete this step first.

After you have copied the dummy file set to your P: drive, you can begin in Peachtree. To start the program in the HSB labs (that's the only place it is available on campus), select the following as shown:

Start, Programs, ACC, Peachtree, Peachtree Accounting

Peachtree can be a bit slow in the labs, so just be patient.  You should first see a Peachtree splash screen that will fade to the following.  When you see this screen, click on the OPEN button.

The OPEN button will display the following box.  You will need to select your P: drive as the source drive.  If you copied the dummy files correctly, you should see Wooden Nickel listed in the company name field.  Click on the WOODEN NICKEL name to open the files.  You are now ready to begin work.

SET UP THE COMPANY

After you have open the company, you will need to make changes to the company information as listed below.  To access this information, select the MAINTAIN -- COMPANY INFORMATION menu option.  Set up the company name as your name.  Then enter the remaining information.  If you do not have the information from the case, just make it up.

Click on Maintain -- Setup Checklist. You may use this checklist to help you with your setup. The checklist provides a convenient way in which to be sure that all the necessary steps are completed. It is not mandatory that you use the checklist; however, you may find it easier to keep track of what you are doing using this checklist.

If you choose to use the Setup Checklist and do not finish all tasks in one session, you may return to it in a later session by clicking on Maintain Setup Checklist.

SET UP GENERAL LEDGER

Click on MAINTAIN -- DEFAULT INFORMATION -- General Ledger. The Rounding Account should be set to "Other Operating Expenses".
 
Click on MAINTAIN --  Chart of Accounts. It is extremely important that you set up the chart of accounts properly. Use the account numbers and related descriptions from your earlier Chart of Accounts assignment. In some cases, you will need to abbreviate the descriptions slightly. The pull-down menu next to "Account Type" requires you to select the type of account for each account number. Many of these are obvious. For those which are not obvious, you will need to refer to the information provided below:
Do not use Income Summary
"Income" accounts include Sales, Sales Returns and Allowances, Sales Discounts Taken, Gain/Loss on Sale of Assets, Gain/Loss on Sale of Securities, Interest/Dividend Income, and Miscellaneous Revenue.
"Cost of Sales" accounts include Cost of Goods Sold, Purchases, Purchase Returns and Allowances, Purchase Discounts Taken, and Freight-In.
 
Click on Beginning Balances. Use the balances in the case material to enter the beginning balances for the Chart of Accounts. Be sure to select the proper period in which to enter beginning balances. IMPORTANT: When entering beginning balances, Peachtree classifies the balances as either asset accounts or liability/equity accounts. Thus, it is imperative that you watch for contra accounts and enter them as negative numbers if necessary, since Peachtree does not recognize them as contra accounts in most instances. When you are finished entering the beginning balances for all accounts, the total of your beginning balances should equal "0". If the total does not equal "0", Peachtree will not allow you to exit until you have fixed the problem(s).

SET UP ACCOUNTS PAYABLE

  1. Click on MAINTAIN -- DEFAULT INFORMATION -- VENDORS. Since the terms vary for each vendor, leave the standard payment terms as C.O.D. with a credit limit of $5,000.00. Set the Purchase Account number and the Discount GL Account number using the pull-down menu.
     
  2. Click on MAINTAIN -- VENDORS. Set up the vendor accounts based on information in the case.. 
     
  3. Return to the checklist and click on the Enter Vendor Beginning Balances and enter the balances for each vendor. (Note: You will not have all of the information requested in this window. It is all right to leave some of the entries blank here.) When you are finished with both vendors, the balances for these accounts should equal the balance you entered as the Accounts Payable GL account beginning balance.


This is a reference book I have prepared for previous classes.  It was originally written using a prior version of Peachtree Accounting for Windows, so some of the screen captures may not correspond to the current version of the software available in the computer lab.  However, the instructions should provide you with some assistance is you are having problems.  An alternative source of help would be the on-line help available through the Peachtree software itself.


This page was last modified on 11/01/00 .